Showing posts with label quinby cottage. Show all posts

Tuesday, March 20, 2012

spring simplicity

spring has definitely sprung around south carolina.


in my house that means a couple things.

1. we are all taking claritin.

and

2. the mantel gets tweaked again.


in keeping with my quest for simplicity around here
the mantel was really scaled back this year.

here's what she looked like last spring, just to give you a comparison.

you can check out more of it here. if you do,
you'll notice we have also painted the brick
surround and removed the big black door insert since
last spring.

this year, i moved some of my favorite prints (from here) from our den
 and placed them over the fireplace.


the branches are from a dogwood tree in our backyard.

aaand, that's pretty much it! boring?


not to me. not this year. i'm loving
the minimal feel of it. maybe it's the chaos that
swallows the rest of our little house that is 
causing me crave clear spaces right now.

i also removed the screen and all our firepoking tools and
 gave the interior of the fireplace a fresh coat
 of heat proof black paint.


for the summer a fern has replaced the fire grate.
also, those aren't specks on the black paint. i just need to sweep! :)

if you are looking for spring mantel inspiration go check out Layla's
mantel at the lettered cottage, where inspiration abounds, and all
the folks linking up today in honor of the first day of spring!

~ stacy ~


Monday, March 12, 2012

long overdue kitchen update

what's that saying about time flying?
fun or no fun it sure is moving swiftly these days.

we've been busy around here with projects.
some fun, some not so fun.
some diy, some hio (hire it out!)

thought i'd catch up on the kitchen today. we've been working on our
little kitchen (on and off and as we have the funds) since we moved
in september of 2010.

here's how she looked when we looked at the house
in august of 2010 (still occupied by previous owners).


it's a small galley kitchen. this is the view from one end, where they had
a table and chairs. just beyond the counter on the right is a swing door leading
into the dining room. behind the bi-fold door is the washer/dryer and pantry.
and a window that looks into the front yard. light!!


and the view from the bi-fold door. on the other side of the fridge is a
door leading to the side of the house and driveway. on the left,
just beyond the counter is a doorway leading into the living area.

since we moved in we have ripped out upper cabs and put in open shelves,
replaced formica counter tops with butcher block, replaced the shallow
stainless sink with a deep white porcelain sink and new faucet,
replaced some lighting, replaced fridge, painted lower cabs, removed bifold door to
laundry room letting so much more light in and added shelves in the
pantry/laundry room for additional storage and organization.

you can read about some of that here and here and here.

there were two items on our list for the kitchen that we have been
waiting on. replacing the nasty floor and building a banquette where
the previous owners had the table.

because we needed the space we used the breakfast nook for storage until
we had the money to do those projects and could figure out the best way for our
family to function in a space four times smaller than our previous kitchen.


this is what that end of  the kitchen looked like until last month. i sold the dresser-turned-island
and the china cabinet to offset the cost of the next phase.

after a month of research we decided to go with lowes to install our floor.
with a coupon and doing some of the prep work ourselves
(like moving appliances out, removing baseboards, etc.) they
were $1,000 less than any other quote we got.


we went with black and white checkerboard tile set on the diagonal.
love it.

here's the view toward the pantry.


for the banquette, our neighbor and his buddy did the work for us.


here is the finished product. with two hinged lids the amount of storage it
provides is fantastic!

there are still a few things to do at this end, like make bench cushions, find just the right light,
and decide what to do with wall space to the left and right. 
 when i finish up i'll fill you in on some of the details of these projects.

until then, this is where i'll be.


my new favorite spot to run our household.

~ stacy ~

Wednesday, December 14, 2011

christmas 2011 tour

i've never been one to go over the top with
christmas decor. i'm not that drawn to the idea of
transforming every room and every surface for the holiday's.

maybe it's because i feel  perpetually tired as a mom
to three boys and wife of a church planting pastor.
tired in a good way, but still, TIRED.

also, our home is small and our living space is open so a little bit
goes a long way!

this year i pulled some greens from the yard to make
 a swag for the front door. i see in this picture the holly is starting to curl up so it
may be time to cut some more. :)


our tree is a little guy and this year we opted to block
our back door for the month. we have a side door around
the corner that also leads to the back yard and our wood pile
so it's worked out pretty well.


brown wrapping, a red locker basket to hold some gifts for
out-of-towners, and some red lanterns hang around the tree which sits in a galvanized
bucket and is wrapped in burlap.


the mantle is a mix of silver, natural elements and red and white accents.


the stockings are held up with a bit of twine.


the boys come downstairs each morning to see how many days
remain before christmas.


the above chalkboard, by the way, has had many lives. it was
originally a silver framed mirror.


a simple grouping of candles and a couple of deer on the buffet.


and on the table a few decorative balls and some greenery from the yard.


otherwise, i've just tucked some greenery from the yard around the house.


y'all go check out all the great house tours over at the nester's
tour of homes and thanks for stopping by!

~ stacy ~

Sunday, November 6, 2011

wall makeovers (& a lot of pictures)

i think someone spiked my chai tea latte's with some
red bull this weekend.

after 14 months in our current home our to-do list is still
pretty long. some big projects and some small.
saturday i was determined to cross off some of the
small projects i'd been dragging my feet on.

namely, dressing up some walls.


i've been working on the boy's room's upstairs as i'm able to get materials.
the stairwell leading up to their space is dark, has poor lighting, and up to now
has had nothing on the walls. bOrInG!

i knew i wanted to deck it out with color and with stuff  that would be
fun for the boys. i want them to love their rooms, and the walk up!

everything on the wall came from around the house. i didn't spend a dime.


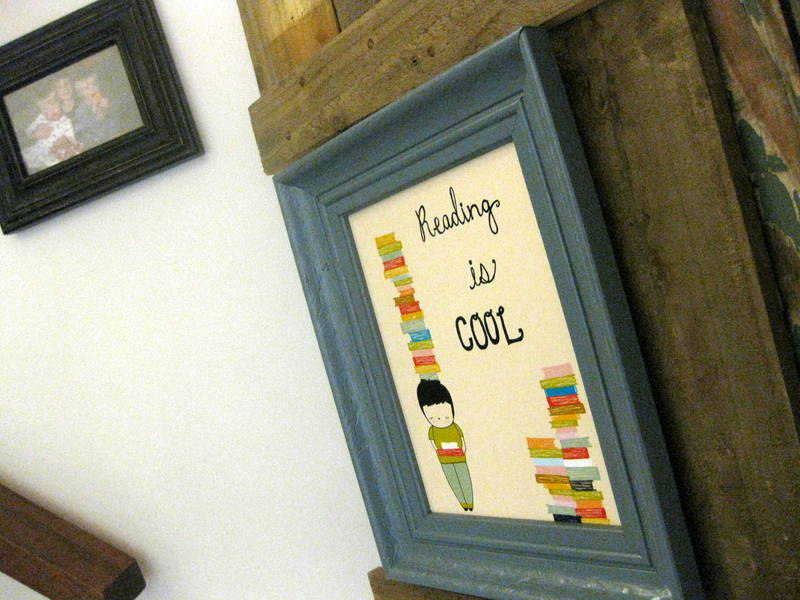
the above print is hanging on an old barn door which is leaning in the corner
on the landing at the bottom of the stairs.
most of the frames received a fresh look with
either spray or craft paint or both.


five keys representing the five of us.


an 8x10 print from my friend jessie. hopefully she won't
mind i cut it up to achieve a different look.


the boys' artwork. . .


the excerpt above is from a book "the clowns of god" talking
about children with down syndrome, challenging the things on which most
people place value.


there are three framed numbers on the wall. a 3, 5, and 7, the ages of the boys
when we moved into quinby cottage.


i can't remember where i got this print. it was years ago. it was on etsy.
that's all i know.


i have just a few spots to fill in and i'm sure
it will be ever changing as the boys grow.


next up is the wall on the other side of the staircase. it looked like this for a
long time. . .


one of our problems in this house has been lack of space for
bookshelves. after tripping over books stacked in wire baskets
and even an old antique wash tub i'd had enough and decided to
throw up a couple shelves on this wall.


(please ignore the different color trim. still working on painting it all out.)

i bought a few scrolly brackets and two 1 x 6 x 6 boards, stained them
and slapped 'em up there.


it really warms up that wall.


looking at this side of the room is totally different now. i love it.


so, that's what i did on saturday.


oh, one other thing got changed. i wanted to use the little mirrors from
our front room in the stairwell.


and the 'w' and the chalkboard which i spray painted red. so i had to
 re-do this wall.


here it is now. prints from jones design company.

whew!

love checking things off my list!

~ stacy ~

Thursday, October 20, 2011

sick day equals progress upstairs


i had other plans today.
plans to hang out with a friend
and help her with a project.
but when tank wandered into my room at 4.30am
with a high fever i knew plans were a changin'.


after dropping spinner and bean at school and getting tank settled on the sofa with some blankets and cartoons
i decided to knock out one
of the 150 things on my to-do list.


the boys' room's have been under a slow over-haul
for a good month or more.
so far i have painted various walls in both rooms
and planked the hall landing at the
top of the stairs that connects their rooms.
today was all about planking a small bit of wall behind
bean's bed.


there is so little light upstairs (as it is nestled in the trees) so pics
are nearly impossible to take. what i'm saying is, forgive the grain!

before i started i realized i needed to slap some
dark paint on that wall because i wanted the
gaps between my wood to be large and
haphazard (and i didn't want butter yellow showing through).


i used 1 x 4's and 1 x 6's cut at varying lengths.
i layed it out on the patio as i cut so that
the seams were where i wanted them.


the rest was pretty easy. i just used my nail gun to put the
cut wood up, starting on the right side to make
sure the wood was flush with the wall's edge.

i did have to extend the outlet.


i use these little plastic doohickeys. they work
great and are super easy.


once extended i finished up and put on the new outlet cover.


like i said, i wanted it to look haphazard and piecemeal with
random gaps and spacing. this picture really shows the gray
wall  through the cracks put in the room the spaces just
look dark, which is what i was hoping for.


i'm pretty pleased with it. i love the natural color
and will just top it off with a coat or two of
wipe-on polyurethane.


now i need to find a swing arm, plug in, wall lamp to put
in the upper right quarter so my little guy can
read in bed.

next step for their rooms is beadboard for the rest of the half-walls.

fingers crossed i have this all done before thanksgiving.
and when i do, i'll give you the full reveal.

~ stacy ~