Sunday, November 6, 2011

wall makeovers (& a lot of pictures)

i think someone spiked my chai tea latte's with some
red bull this weekend.

after 14 months in our current home our to-do list is still
pretty long. some big projects and some small.
saturday i was determined to cross off some of the
small projects i'd been dragging my feet on.

namely, dressing up some walls.


i've been working on the boy's room's upstairs as i'm able to get materials.
the stairwell leading up to their space is dark, has poor lighting, and up to now
has had nothing on the walls. bOrInG!

i knew i wanted to deck it out with color and with stuff  that would be
fun for the boys. i want them to love their rooms, and the walk up!

everything on the wall came from around the house. i didn't spend a dime.
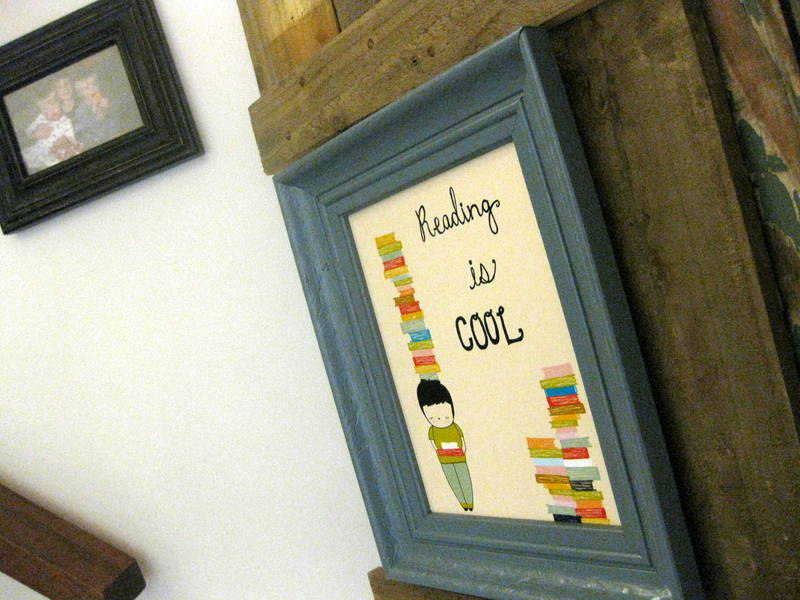

the above print is hanging on an old barn door which is leaning in the corner
on the landing at the bottom of the stairs.
most of the frames received a fresh look with
either spray or craft paint or both.


five keys representing the five of us.


an 8x10 print from my friend jessie. hopefully she won't
mind i cut it up to achieve a different look.


the boys' artwork. . .


the excerpt above is from a book "the clowns of god" talking
about children with down syndrome, challenging the things on which most
people place value.


there are three framed numbers on the wall. a 3, 5, and 7, the ages of the boys
when we moved into quinby cottage.


i can't remember where i got this print. it was years ago. it was on etsy.
that's all i know.


i have just a few spots to fill in and i'm sure
it will be ever changing as the boys grow.


next up is the wall on the other side of the staircase. it looked like this for a
long time. . .


one of our problems in this house has been lack of space for
bookshelves. after tripping over books stacked in wire baskets
and even an old antique wash tub i'd had enough and decided to
throw up a couple shelves on this wall.


(please ignore the different color trim. still working on painting it all out.)

i bought a few scrolly brackets and two 1 x 6 x 6 boards, stained them
and slapped 'em up there.


it really warms up that wall.


looking at this side of the room is totally different now. i love it.


so, that's what i did on saturday.


oh, one other thing got changed. i wanted to use the little mirrors from
our front room in the stairwell.


and the 'w' and the chalkboard which i spray painted red. so i had to
 re-do this wall.


here it is now. prints from jones design company.

whew!

love checking things off my list!

~ stacy ~

Thursday, October 20, 2011

sick day equals progress upstairs


i had other plans today.
plans to hang out with a friend
and help her with a project.
but when tank wandered into my room at 4.30am
with a high fever i knew plans were a changin'.


after dropping spinner and bean at school and getting tank settled on the sofa with some blankets and cartoons
i decided to knock out one
of the 150 things on my to-do list.


the boys' room's have been under a slow over-haul
for a good month or more.
so far i have painted various walls in both rooms
and planked the hall landing at the
top of the stairs that connects their rooms.
today was all about planking a small bit of wall behind
bean's bed.


there is so little light upstairs (as it is nestled in the trees) so pics
are nearly impossible to take. what i'm saying is, forgive the grain!

before i started i realized i needed to slap some
dark paint on that wall because i wanted the
gaps between my wood to be large and
haphazard (and i didn't want butter yellow showing through).


i used 1 x 4's and 1 x 6's cut at varying lengths.
i layed it out on the patio as i cut so that
the seams were where i wanted them.


the rest was pretty easy. i just used my nail gun to put the
cut wood up, starting on the right side to make
sure the wood was flush with the wall's edge.

i did have to extend the outlet.


i use these little plastic doohickeys. they work
great and are super easy.


once extended i finished up and put on the new outlet cover.


like i said, i wanted it to look haphazard and piecemeal with
random gaps and spacing. this picture really shows the gray
wall  through the cracks put in the room the spaces just
look dark, which is what i was hoping for.


i'm pretty pleased with it. i love the natural color
and will just top it off with a coat or two of
wipe-on polyurethane.


now i need to find a swing arm, plug in, wall lamp to put
in the upper right quarter so my little guy can
read in bed.

next step for their rooms is beadboard for the rest of the half-walls.

fingers crossed i have this all done before thanksgiving.
and when i do, i'll give you the full reveal.

~ stacy ~

Friday, October 14, 2011

homemade laundry detergent


laundry detergent is expensive.
have you noticed? of course you have.
even with coupons and sales and combining the two.


no, that's not grated cheese

so, i made my own.
there are all sorts of homemade recipes out there
for liquid and powder detergents.

here's what i used:

2 cups borax ($3/box)
2 cups arm & hammer super washing soda ($3/box)
1 bar fels-naptha soap (less than a buck/bar)


mix the two powders and "grate" the soap. stir it all up
good then throw itin your food processor and mix until
the soad is so fine you just see pretty yellow specs
throughout the powder.


pour it into a suitable container, i used a glass
canister that has been sitting empty.

then make a pretty label and enjoy.


i use 1 tablespoon per load.
with three smelly/dirty little boys and one big
boy that runs and cycles and sweats like no one
i've ever met i knew this stuff was going to have to work hard.
after 3 weeks i am very pleased. everything is
clean and smell super fresh.

i doubled the recipe so i'd be set for a while and there is plenty
left in both boxes of powder for another batch!

happy laundering!


Wednesday, October 12, 2011

life and a yard sale


mornings are always a bit hectic around here.
school drop off is 7.00am.
we walk out of the door at 6.55am.

at 6.45am the hall bathroom looked something
like this.


the toilet lid was closed prior to the snapping of
this picture in order to protect your eyeballs.

~~~~~~~~~~~~~~~~~

while waiting on the plumber i got busy with sorting items for
our yard sale this saturday.


need some china? linens? vintage aprons?


home accessories? come on out. we'll have furniture
and lamps, too.


and ironstone. it's killing me but i'm thinning my collection
in order to maintain my simple living commitment.

if you're local holler and i'll give you directions.

~ stacy ~

Saturday, October 1, 2011

project updates: whitewash and boy rooms!


i did it.

i made a decision on the brick fireplace treatment.
it's not done yet but i have had a few people ask to see what i'd done so far,
so here ya go.

i used a 50/50 ratio of primer to water, grabbed a brush
and started applying.


the whitewash is on. it took about 1.5 hours and dried super
fast.

next step is to take a wire brush to it to rough it up just a bit and
expose a little more of the brick.


we love it! even without the roughing up.
pastor j has been wanting me to paint
it for a while so he is especially pleased with it which
makes me happy.

we also have a few things going on upstairs in the boys'
quarters. it involved this. . .


and some of this. . . 


and now we are here. . .


this is luke's corner. he styled the shelves himself. :)
next week beadboard will go up on the side walls, beneath
the pitched ceiling.

wil's corner is gonna be sweet, too.
and timmy? he's getting a splash of green in his room!


Thursday, September 22, 2011

to paint or not to paint?

* paint brick fireplace!

that's on my project to-do list.

it should have been checked off by now so that
it would be ready for use this winter.


it's not.

i'm generally not one to shy away from slapping
paint on anything but for some reason
i feel tentative about painting the brick.
does that mean i shouldn't do it?

after we moved in i immediately painted the shiny brass
fireplace insert black.


that was easy and greatly improved things.
but in the back of my mind i knew i'd eventually paint the brick.

in anticipation of painting it this summer i cleaned her
out really well in the spring and removed the big
honking insert.

this is how it sits now.


when i took the insert out i realized i'd done a rotten
prep job before painting it. note the black rim around the opening.

so, now, i have to paint the brick.
right?

i do like the warmth of brick. i think i'm afraid i'm going to want
it back and this is one paint job you just can't undo.

however, every time i see a painted brick fireplace, like this one from


 i'm ready to pull out my brush!

i also love the brick treatment in this kitchen.

and this whitewash treatment is great.

source

what to do, what to do?

i'm leaning toward a whitewash so that some of the warmth
of the brick will come through.

any opinions? i'm wide open.

~stacy~


Wednesday, September 21, 2011

a shot of red


One year ago my family moved into Quinby Cottage.

Since then we have been busy trying to make this downsize
work for our family of five by creating a warm
and functional space.

We're getting there.
You can see a little of what we've done
here, here, and here (where she's all cleaned up for Christmas).

We've knocked out wall's, pulled out kitchen cabinetry, painted,
put up board and batten and horizontal planks, and changed out some lighting.

There is still so much more to be done and I've been in a bit of
a diy rut lately!
I knew that in order to get out of the rut I needed
to tackle a quick project that would provide instant
gratification. And it needed to be cheap.
So, I finally painted our front porch swing.


My mom and dad gave us this swing the week we moved in and it's
been on my long "project" list ever since. It was the perfect project
to get me going again.

I decided to paint it the same red as our front door, which I had on hand.


Nothing like an easy update that packs a punch to
get the diy juices flowing!


It's time to re-visit my project list and get busy!


Stay tuned!

linking up with The Shabby Nest for Frugal Friday.